Monday, October 31, 2011
Friday, October 28, 2011
Pull Quotes --Try This!

Want to know how?
Go to this web page Read the source, load it into your web editor... and have fun!
Thursday, October 27, 2011
Border TRouBLe, a CSS shorthand tip!
TRouBLe is a mnemonic, a learning aid... for CSS values for border, padding and margins
Instead of writing:
- border-top-width: 2px;
- border-right-width: 3px;
- border-bottom-width:4px;
- border-left-width:3px;
You can just write border-width: 2px 4px 6px 8px;
The order is Top, Right, Bottom, Left easily remembered with the word TRouBLe!
Also if you don't want the right side to have a value at all, instead of writing 0px, don't add the unit, just write 0
For example:
border-width: 2px 0 6px 8px;
Week 4 -Outline and Resources
Week 4 Outline
CLASS #4 Notes:
“Don't make it hard for your clients
to contact you" --anon
Building a banner, positioning content, menu layout and contact forms.
Subjects
- Banner -Inserting backgrounds, images.
- TRouBLe --Position Rules
- Menus/navigation
- Layout
- Contact Forms! (Next week)
Objective
Objective
To build a web site consisting of at least 3 web pages.
This week
- Banner -Inserting backgrounds, images.
- Menus/navigation
- Layout TRouBLe --Using the Position Rules
How! Web Page Creation Preparation for Week 4
Resources for this week -- go to these URL's
The Banner Tutorial -images & backgrounds and html5
The Banner Tutorials
Generating Menus
The Menu Tutorials
The List-o-matic menu generator
List-o-matic
Layout
Using the Position Rules
Try some simple layouts
Homework
- Generate a menu, and insert on your web page
- Finish the layout of your "home" (index.html) web page
- Duplicate your index.html web page 3 times... and re-name them Contact.html, About.html, Product.html
- Read all about Contact e-mails and Contact Forms!
The Contact Form Tutorial
Navigation Here
On-Line and desktop References for html and CSS
Sitepoint also offers a "plug-in called Code Burner, it's a quick interface that resides on your desktop or in your FireFox Browser. It is linked to the Sitepoint on-line references for CSS and HTML. Check out Code Burner!
Graphically Challenged?
The Cool Text web site will help you design a logo. The Cool Text Wizard
Monday, October 24, 2011
WYSIWYG --Visual Web Editors
Is there a way to edit a web page directly without using an html text editor? Is there a way to design a web page visually?
The answer is, YES! Sometimes a visual editor is real handy to have around!
If you have purchased the Coffee Cup HTML Editor, you'll discover that it comes with a visual editor. You might not notice it as it might be "turned off!" I found this "Faq" on the Coffee Cup web site.
Visual Editor Tab not displaying at all.
Solution: With the update to the latest version of the HTML Editor, the Visual Editor has been turned off by default. We did this to provide the best possible user experience. But don't fret — this is an easy issue to fix. To re-enable the Visual Editor, launch the Editor and go to the Tools > Preferences > General tab. Once there, uncheck the Hide Visual tab option...

When you click on the Visual Editor Tab you can edit directly on the web page.
Insert HTML elements just like using a word processor...

Give it a try!
Coffee Cup has another Wed Editor that could be better described as a web designer. It's called Visual Site Designer.
If you are visually oriented this might be a great editor for you. You can download a free trial from Coffee Cup's web site

If you have a Mac (or a PC) you can try the Open Source program Kompozer (It's Free)
Click the link below to start the Download and give it a try.! Load a web page and start adding your content directly on the web page!
 kompozer-0.8b3.en-US.win32.exe (Windows™ installer)
 kompozer-0.8b3.en-US.mac-universal.dmg (Mac OS X™)

There is other software, noteablely Adobe's Dreamweaver, but this class is not about web editors, it's about creating a web site!
Web Editors are our tools of the trade!
Got a question,? 'Holler!
Thursday, October 20, 2011
Week 3 Review -The Box Model and Basic CSS
Week 3 Outline
CLASS #3 Notes:
“People don't read web pages,
they scan them!" --anon
The Box Model. Div's and CSS
Subjects
- The Box Model
- Div's
- CSS, some simple rules
- How to Make a Banner/Header
Objective
Objective
To build a web site consisting of at least 3 web pages.
This week
- How to use the <div></div> element. The Box Model
- Styling with CSS
How! Web Page Creation Preparation for Week 3
Resources for this week -- go to these URL's
The Box Model
http://uofgts.com/BasicWD/BoxModel.html
Basic CSS Rules
http://uofgts.com/BasicWD/CSSRules.html
Homework
Work through the Banner Tutorials
Navigation Here
On-Line and desktop References for html and CSS
Sitepoint also offers a "plug-in called Code Burner, it's a quick interface that resides on your desktop or in your FireFox Browser. It is linked to the sitepoint on-line references for CSS and HTML. Check out Code Burner!
Graphically Challenged?
The Cool Text web site will help you design a logo. The Cool Text Wizard
Sunday, October 16, 2011
Week 2: Check List and Homework
Howdy
Where we are at, a check list:
Week 1
- Your web editing environment should be setup.
- For this class the Master Web Site Folder should be on your Thumb Drive
- Downloaded and installed your web editor of choice
- It is important that your web editor, when it opens can access the files in your Web Site Master Folder.
- Otherwise your web site just won't work!
- Your web editor knows how to link to your Web Site Server (if you don't have one yet, that's okay)
- Downloaded and installed at least 3 web browsers
You can access all the information you need to achieve above from the web page for Week 1: Getting Started
The result is that when you come to class you can startup Coffee Cup or Dreamweaver, or the editor of choice on your laptop and be ready to work.
Week 2
You should now be able to:
- Load a web page located in your Master Folder to edit in your html editor.
- Insert between <body> and </body> using your web page html editor your content as text and image(s)
- You should be able to format the inserted material as html elements. Especially:
- Headings
- paragraphs
- lists
You can access all the information you need from the web page Week 2: Content and xhtml
Other Homework
On the CLASS CD is a .pdf file called textbook-short version.pdf read up to Splitting Up the Page on page 42.
If you have the book, Build Your Own Web Site The Right Way by Ian Lloyd, read up to page 59
You can download the first 4 chapters of the book from Sitepoint.com for free. It's a really good book.
I'd also like you to just read about "links" on the class web site Links: It's what makes the Internet Work!
Next: Is there an "other" way to edit make web pages?
Wednesday, October 12, 2011
Create a Web site - Weeks 2 outline
Week 2 Outline
CLASS #2 Notes:
“If you really want to know if your
Web site works, ask your next
door neighbor to try using it, while
you watch.
(You bring the beer.)”
http://www.sensible.com/
Content and xhtml
Subjects
- Adding Content to a basic Web Page
- xhtml - some rules
- (x)html elements - defined
- Formatting your content
- The <img /> element
- Image editing
- Inserting a graphic on a web page
Objective
- Image editing
- Inserting a graphic on a web page
Objective
To build a web site consisting of at least 3 web pages.
This week
- --Adding Content and formatting content with xhtml
- Working with images
How! Web Page Creation Preparation for Week 2
Resources for this week -- go to these URL's
The xhtml rules
http://uofgts.com/BasicWD/xhtml.html
Oh no, more rules! Things you need to know!
TYNTK
A VERY basic xhtml web page
The Basic Web Page
SumoPaint SumoPaint
Homework:
An xhtml tutorial
The Building Blocks of a Web Page
Format your content
Using the Web Editor of your Choice
Either start with a Basic Blank Page
BasicCSSpage.html, Basic-xHTML-page.html
Or Choose one of these layouts.
html5-3col.html, html5-2colindex.html,
Basic-layout.htmlPlay with Sumo Paint
SumoPaint
add an image or graphic or logo to your content!
An image tutorial
Inserting Images
Navigation Here
- Week 2 (this link is this page rendered in html5)
- Home
- xhtml rules
- Oh No, More Rules!
- Lesson 2 (color)
- Inserting Images
- xhtml Cheatsheet
- Links, key to the web
Some vocabulary
.php
- - Personal Home Page is actually a server side scripting language
- An xhtml element
- is made up of an opening tag like <h1> and a closing tag </h1>.
- Depreciation
- - deprecation is applied to software features that are superseded and should be avoided. Deprecation may indicate that the feature will be removed in the future. Features are deprecated—rather than being removed.
- http
- - hyper text transfer protocol.
- ftp
- - file transfer protocol
- XHTML
- – The Extensible Hypertext Markup Language.
- a markup language that has the same depth of expression as HTML but also conforms to XML syntax.
- The intersection of HTML and XML a reformulation of HTML in XML.
Sunday, October 09, 2011
Create A Web Site. What you need to do first review.
Howdy
Rule #1 Test early, test often.
I hope you all enjoyed the first Create A Web Site Class and you are looking forward to next weeks class as we are going to make a web page!
Yes, I know, in the mean time... there is a lot of busy work... it'll get better, I promise!
Setup
The first thing you need to do is finish setting up your "work" environment.
1. You need to install on your computer several web browsers, so you can follow Rule #1
"Test early, test often"
Setting up our work environment on your computer.
Install at least 3 browsers, Internet Explorer, Firefox and Chrome (You might also consider Safari and Opera)
If you have a Mac--- there is NO Internet Explorer for a Mac!
So, how do you test your web pages for IE?
For now you can use Adobe's Browser labs... (you don't need to own any Adobe Software!)
After April 12, 2012 Adobe Browser Labs will be a subscription service.
https://browserlab.adobe.com/en-us/index.html
2. Install your editor
Install CoffeeCups Free HTML Editor, you can download it from CoffeeCup's Website
Or install the web Editor of your choice.
I ENCOURAGE you to experiment and try different web editors, so if you have a preferred Web Editor, by all means use it!
You might find this article interesting, I wrote it a while back
http://stasiuk.blogspot.com/2008/10/web-page-editing-nirvana.html
Step 2:
Setting up your Master "Local" website

From the Class CD Copy the YourWeb-Site Folder to a Flash Drive (USB Stick Drive) so you can work on your site at school or at home or at work!
Also maker an "empty" Website-Parts" folder on your flash drive.
(After you are done with class you can copy the folders to where ever you want on your computer.
Step 3:
Sit down and write out what you think you want on YOUR home Web Page --The Content.
You can use pencil and paper, Word, or the Web Editor of you choice like coffee cup.
Don't worry about Xhtml or CSS, we'll do the formatting in class.
Save your "content" information and bring it to class...
remember, its the most important information on YOUR web page... the content!
We'll make our first web page in class Wednesday!
Resources
Read the online Lesson 1 for help in figuring out your content.
 I highly recommend the following book
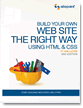
Build Your Own Web Site The Right Way Using HTML & CSS, 2nd Edition by Ian Lloyd Edition: ISBN: 978-0-9804552-7-4 Published: December 2008
(It's now in it's 3rd edition.)
If you have the book, Read Chapter 1 and Chapter 2 through to the end of page 47ish
If you don't have the book, On the Class CD disk in the folder "Articles" read The BeginnersGuide.pdf, it is a terrific synopsis of the above Ian Lloyd's book, of all things written by Ian Lloyd!
You can also down load the sample pdf for the book at sitepoint.com. The Sample download has at least the complete chapters 1 and 2!
Have fun!
If you have any questions 'holler
but, I think a post (comment) here works much better
Got a question, Post a comment or send me an e-mail
Friday, October 07, 2011
Coffee Cup Video Tutorials no longer exist!
Thanks to Garland Holt for informing me that the Coffee Cup Setup video no longer exists!
Darn!
I contacted the folks at Coffee Cup and here's the response
Hi Garry
Our traffic to the videos was so low we decided it just was not worth the effort to continue. It just became more work then it was worth.On a plus side, we have a great many tutorials on our website at~_~_~_~_~_~_~_~_~_~_~_~_~_~_~_~
Scott A. Swedorski - VP of Product Development
CoffeeCup Software Inc.
Phone: 678.495.3480Hi Garry
Garland stated in his e-mail that there are lots of Coffee Cup users that have made videos on how to use the software. Here's the link
Garland sent http://youtu.be/A8qCy3o7hso it's by instructor Teresa Pelkie at Palomar College. There are other videos too!
Perhaps you can view the videos and let us know which ones you like the most.
This link will take you to the step-by-step instructions for setting up your Master website
http://www.coffeecup.com/help/articles/working-with-website-projects/#creating
at this link you can explore all the tutorials that Coffee Cup has posted
http://www.coffeecup.com/help/articles/
Got a question, comment or send that e-mail!
Thursday, October 06, 2011
Setting up your Mac
Howdy
The Mac folks want you to place your master "website" in a folder called Sites. It's a shared folder located in your home folder
Yourmacusername > Sites
If you have an index file in the Sites folder you'll see it In your browser if you type
http://127.0.0.1/~yourmacusername/index.html
(127.0.0.1 is the same as the phrase "localhost") so you can also type
http://localhost/~yourmacusername/index.html
You'll see your index.html page in the browser
This works as the Mac comes with server software built-in, it's called Apache.
If you need to run PHP and a SQL database, there is a different configuration... For now the above works! But, if you need help setting up PHP and SQL let me know...
On my Mac I use a program called Coda
I like Coda, as it can display the markup, the css and a preview, all at the same time.
It looks like this, Files on the left, the html next, a preview and a CSS editor on the right.

It would look much better, and less cluttered on a larger monitor... (one day I'll get the 27 inch iMac)
Here's a link on to how to setup Coda. It's from their developer user page...
You can try it out for free for a 30 day period. Panic, the publisher/authors are local, they live in Portland.
Here's the link
http://www.panic.com/coda/developer/
If you have any questions, send that e-mail!
Setting up Dreamweaver for Macs and PC's
It's really important to setup Dreamweaver BEFORE you begin any project.
Here's a link to my "Dreamweaver" website for setting up Adobe's Dreamweaver
First.
Click on the "File Management" tab, it's a link to a really good Adobe tutorial movie...
(You'll need the ftp address from your host, and your log-in password for your website.)
Second.
Click on the "Set Up" tab. Each menu listed in the tab will popup specific instructions for the listed menus. The popups are:
Preferences > General
AP Elements
File Types Editor
New Document
Preview In Browser
Status Bar
Got a question? Send that e-mail! or leave a comment!
Setting up Coffee Cup's FREE html Editor
Howdy
This video from the CoffeeCup Website takes you through the steps to set up Your website project(s), For our Class the Your "Master-website" Folder on your computer.
After you have copied the "YourWeb-site" Folder to your USB drive, and renamed it. Watch the video and follow the steps.
When you are done with the video the Editor's MY Website Tab, Local Disk, should look like this...
except I added some html5 layouts... "html5-3col.html" and "html5-2colindex.html"

Have fun playing with the free HTML Editor, and working on formatting the content.for your website.
Questions? Send an e-mail
Subscribe to:
Posts (Atom)